事前准备

配置 VSCode 调试插件

分别在 SplunkVSCode 上安装对应的插件:Splunk Add-on for Microsoft Visual Studio CodeSplunk Extension

在VSCode的settings.json中配置Splunk:

1
2
3
4
"splunk.spec.FilePath":  <$SPLUNK_HOME/etc/system/README/>,
// "splunk.spec.FilePath": "/opt/splunk/etc/system/README/"
"splunk.commands.token": <token>,
// "splunk.commands.token": "eyJraWQiOiJzcGx1bmsuc2VjcmV0IiwiYWxnIjoiSFM1MTIiLCJ2ZXIiOiJ2MiIsInR0eXAiOiJzdGF0aWMifQ.eyJpc3MiOiJwZW9ueSBmcm9tIHRlc3Rtb25pdG9yIiwic3ViIjoicGVvbnkiLCJhdWQiOiJWU0MiLCJpZHAiOiJTcGx1bmsiLCJqdGkiOiJiODg4ODYxNjljYWQyZmU1OWFlNGMwY2U5N2NlMDE5NmE3OTBiNDY1YWVkMjA1OGUyMDA3NzU1ZTNiZTg1ZWNlIiwiaWF0IjoxNzA1Mjg0MjM3LCJleHAiOjE3MDc4NzYyMzcsIm5iciI6MTcwNTI4NDIzN30.I6JGbcxGIJLSoqhMVG7acdAH7C4xCT_iZBfe1JQAccAuvKgxLjsdbAnw5w5vzT5793R8X8yPeS-avYU7wMilWA",

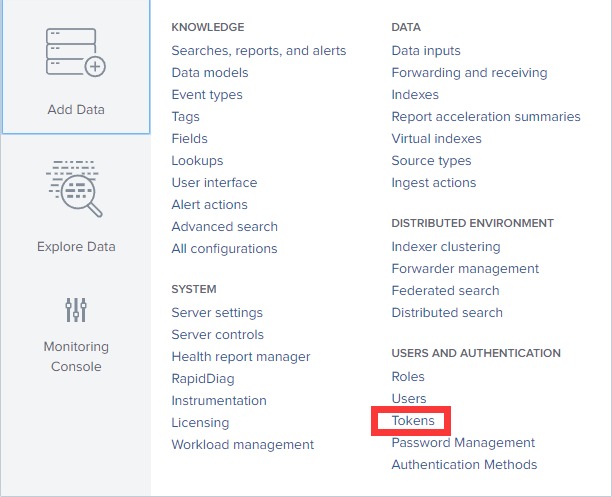
token 获取方法(Splunk系统必须启用KVStore):

token

配置 Splunk 调试插件

在 Splunk Web 界面上打开 Manage Apps 界面,直接点击 Install app from file 按钮,将 Splunkbase 上下载的安装包直接导入即可。

Install Apps

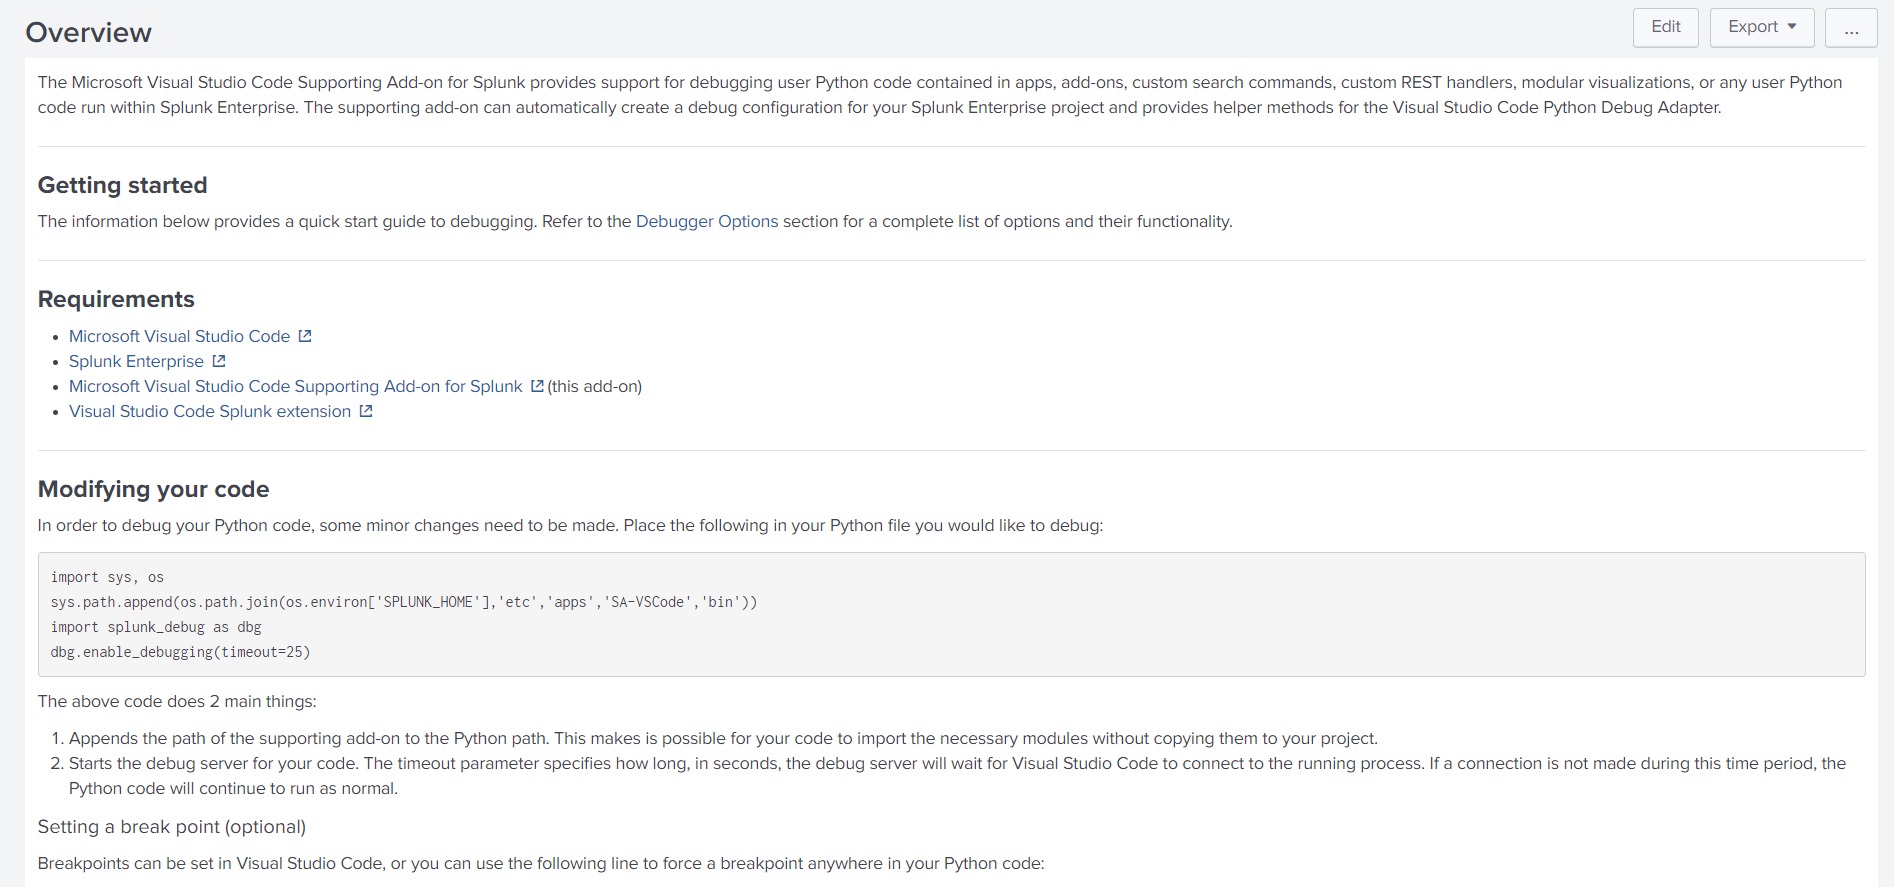
安装完成之后,可以看到 Apps 中已经存在 Microsoft Visual Studio Code Supporting Add-on for Splunk 这个App,打开 App 可以看到调试方法。

VSC Ad-ons on Splunk

使用自定义脚本模板开发

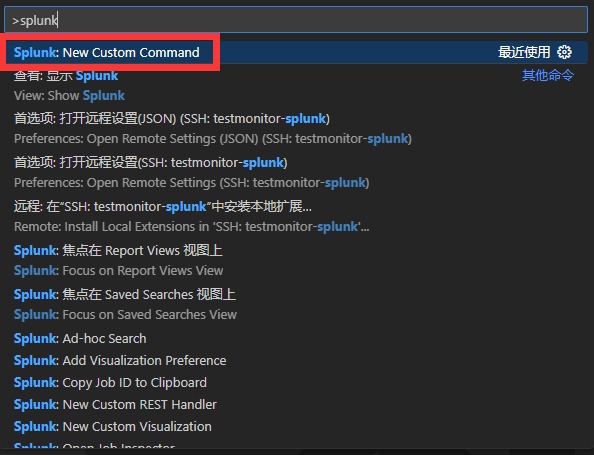
打开 VSCode 命令面板(Ctrl+Shift+P),输入 Splunk ,找到VSC插件内置好的脚手架:

scaffold

下载Splunk-SDK

使用下方命令将 splunk-sdk 安装到自定义Apps的 \bin 目录下

1
pip install -t $SPLUNK_HOME/etc/apps/<APP_NAME>/bin splunk-sdk

同理,安装其他第三方库也可以用同样的命令:

1
pip install -t $SPLUNK_HOME/etc/apps/<APP_NAME>/bin <install-pip-package>

编写脚本

Github传送门: xThreatBook
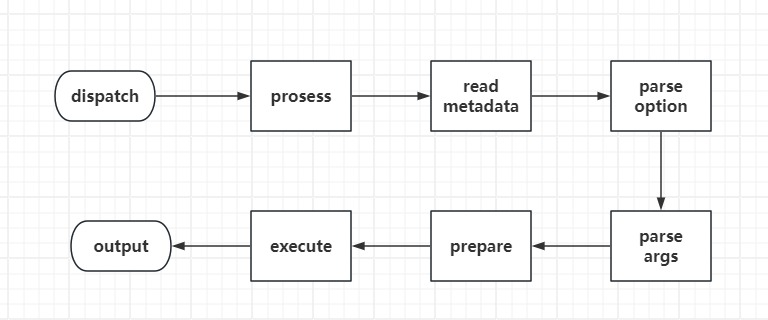
执行流程

the cummand prosess

添加提示信息

根据官方文档,编写如下提示信息:

1
2
3
4
5
6
7
8
9
10
11
12
13
14
15
16
17
18
19
20
21
22
23
[threatinfo-command]

syntax      = threatinfo threat_url=<fieldname> (query_type=(scene_ip_reputation))?  (query_type=(ip_query))?  (query_type=(domain_query))? (query_type=(scene_dns))? (query_type=(ip_adv_query))? (query_type=(domain_adv_query))? (query_type=(domain_sub_domains))? (query_type=(scene_domain_context))?

shortdesc   = Fetch threat information from XThreatBook.

description = This command could fetch threat information from XThreatBook by API according to the IPs or urls which the user put in.\i\

    <query_type> - Optional, determine which type of XThreatBook API to use. \i\

    <threat_url> - The "url" must be a field, and the result will be output into field which name "response".

example1 = .. | threatinfo threat_url=url

comment1 = The "url" must be a field, and the result will be output into field which name "response". Then you can use SPL command "spath" to parse the result.

related = spath

usage = public

tags = threat_url query_type

maintainer = Ventus

注释

pip install 参数解释

使用 pip help install 命令可以看到对应解释:

1
2
3
4
-t, --target <dir>          Install packages into <dir>. By default this
will not replace existing files/folders in
<dir>. Use --upgrade to replace existing
packages in <dir> with new versions.