
wsl安装踩坑记录
WSL 安装
启用 Windows 子系統 Linux 版:
1 | dism.exe /online /enable-feature /featurename:Microsoft-Windows-Subsystem-Linux /all /norestart |
启用虚拟化:
1 | dism.exe /online /enable-feature /featurename:VirtualMachinePlatform /all /norestart |
设置wsl2为默认版本:
1 | wsl --set-default-version 2 |
WSL 更改安装位置
首先,查看已安装的子系统版本:
1 | wsl -l -v |
然后,将想要更改目录的子系统指定位置,导出为tar文件:
1 | wsl --export <Distro> <FileName> [Options] |
其中,<Distro> 为需要导出的镜像,<FileName> 是导出的路径和 tar 文件名称,具体例子如下:
1 | wsl --export kali-linux F:\kali.tar |
接着注销当前分发版,也就是卸载现在安装的 Linux 子系统:
1 | wsl --unregister kali-linux |
最后,重新导入并安装子系统到新的目录,例如
1 | wsl --import kali-linux F:\tools\wsl F:\tools\wsl\kali.tar --version 2 |
删除已导出的tar文件(可选,也可保存压缩包为镜像)
1 | del kali.tar |
WSL 配置子系统代理
设置ALL_PROXY环境变量
我尝试了网上两种常用的配置方法,但都无法在我的机器上实现,不得已使用 proxychains 来完成代理:
通过查找 Linux 子系统的 IP 地址,配置代理地址,同时打开 Windows 防火墙是代理流量通过;①直接配置 Windows 的 IP 地址进行代理;[②](#通过Windows IP 进行代理)直接下载
proxychains对命令行进行代理
1 | sudo apt install -y proxychains |
然后配置 proxychains4.conf 文件,根据安装位置不同,可能在 /etc/proxychains4.conf 处或者 /usr/local/etc/proxychains4.conf 处,修改代理为
1 | [ProxyList] |
<Windows IP> 是对应的 Windows IP ,如 192.168.0.xxx 等, <Port> 是代理端口。
前两种方法的踩坑记录保存在隐藏框中。
WSL 更改默认登录账户
wsl 默认是通过 root 账户登录的,出于安全考虑,希望能更换成常规账户登录.
通过 <distro name>.exe config --default-user [new default user] 命令,其中 <distro name>.exe 是需要更换用户的WSL发行版的可执行文件, [new default user] 是需要切换的用户。例如,安装了 Ubuntu 20.04 需要切换默认用户为 peony ,运行 ubuntu2004.exe config --default-user peony 即可。
Win-Kex SL模式踩坑
安装VcXsrv
根据官方文档提到的依赖( Prerequisites ):
Prerequisites
VcXsrv requires Visual C++ Redistributable for Visual Studio 2015 (vcredist140)
It should be included in standard Windows installations but if you receive an error complaining that it is missing, just download and install it
(Optional, but recommended) VcXsrv running directly on the host
Start -> Settings -> Update & Security -> Windows Security -> Open Windows Security Firewall & network projection -> Allow an app through the firewall -> Change settings -> Select both entries of “VcXsrv windows server” -> OK
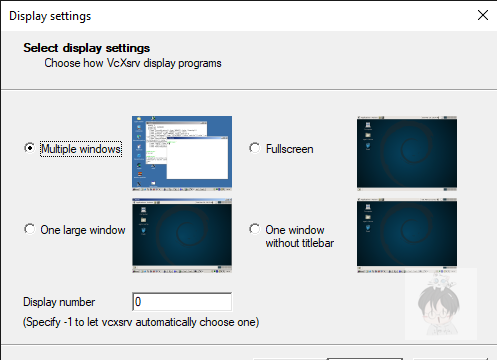
首先需要安装 VcXsrv 软件:
VcXsrv 是一个 Windows 上的 X 服务器软件,用于在 Windows 操作系统上运行和显示X窗口系统的图形界面应用程序。X窗口系统是一种用于在网络环境下实现图形用户界面的开放标准。
VcXsrv 允许用户在 Windows 主机上通过 X 协议与远程 Linux 或 Unix 服务器进行通信,并在 Windows 桌面上显示 Linux 或 Unix 应用程序的图形界面。它提供了一个 X 服务器实现,可以接收来自远程服务器的图形输出并将其渲染到 Windows 的桌面上。这样,用户可以在 Windows 系统中同时运行和访问 Linux 或 Unix 应用程序,无需在本地安装这些应用程序。
VcXsrv 具有配置灵活、性能良好以及与多个窗口管理器和桌面环境的兼容性等特点。它提供了一种方便的方式,使用户能够在 Windows 系统中享受到来自 Linux 或 Unix 系统的图形界面应用程序的便利。
VcXsrv 在 Windows 平台上广泛用于开发者、系统管理员和使用 Linux 或 Unix 应用程序的用户之间的远程图形界面访问和交互。
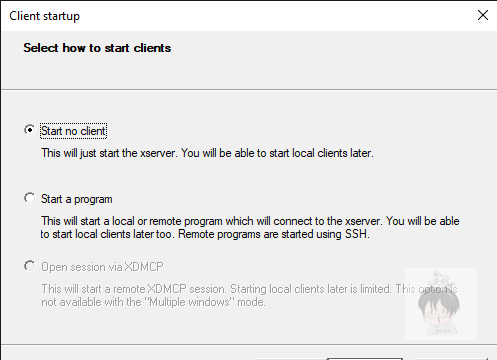
安装步骤选择如下:
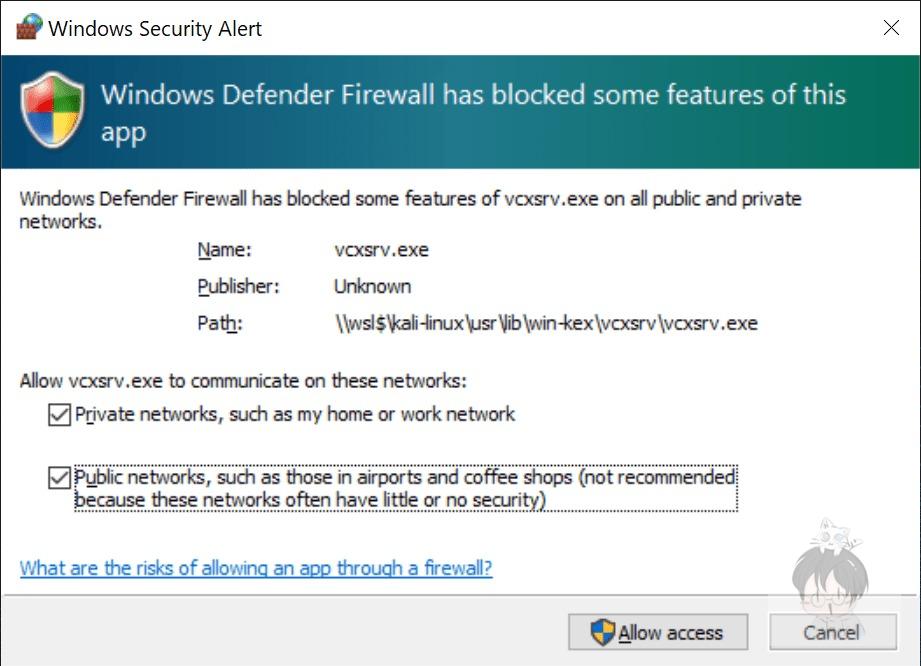
VcXsrv 防火墙配置
成功打开 VcXsrv 后,需要配置防火墙策略,在公用网络和私人网络上都允许进出:
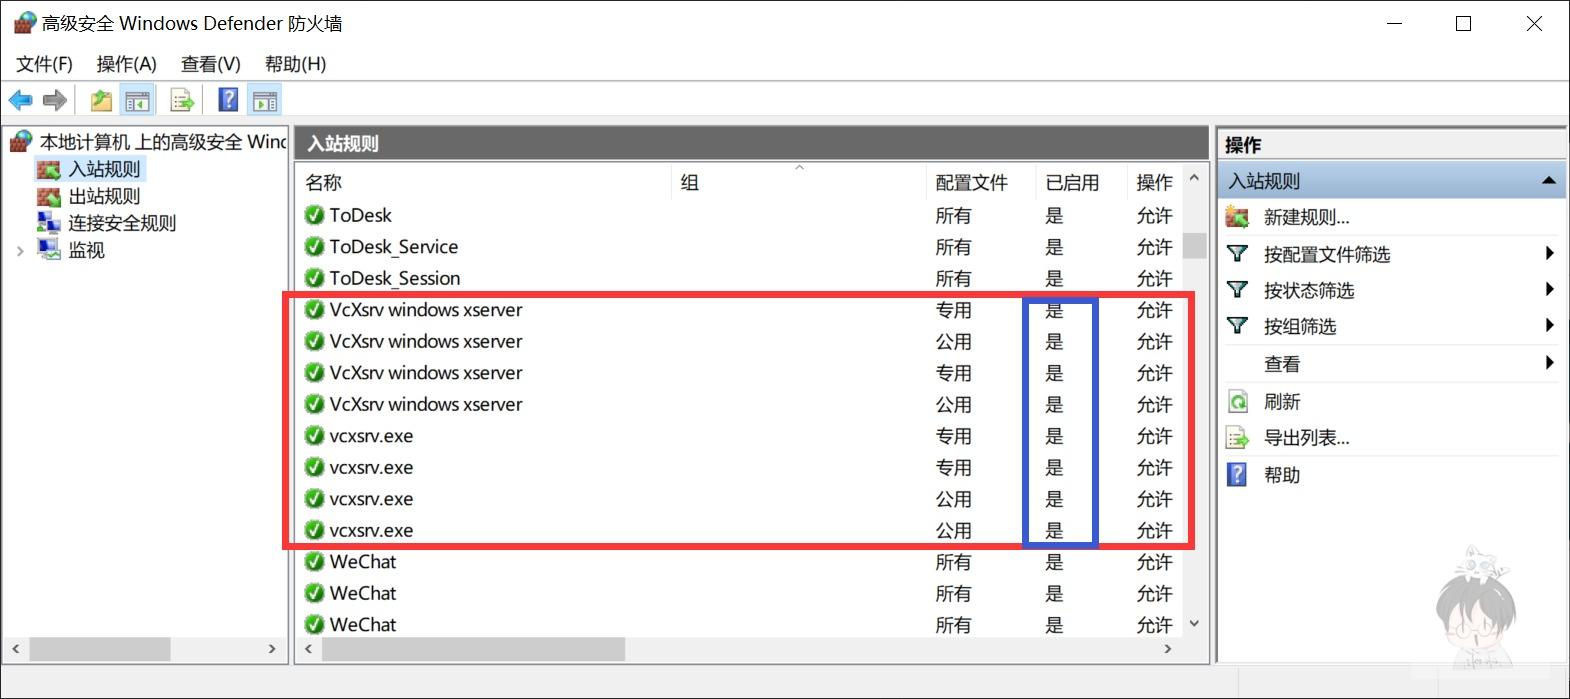
如果不小心按错了,可以在 Windows Defender 防火墙->入站规则中重新配置
使用 Win-Kex SL模式
前提条件:正常运行 VcXsrv
运行方式:
- 通过普通用户运行命令
kex --sl即可使用 Win-Kex Seamless Mode - 在 Windows Terminal 配置文件(
setting.json)profile项中,进行如下配置1
2
3
4
5
6{
"guid": "{55ca431a-3a87-5fb3-83cd-11ececc031d2}",
"hidden": false,
"name": "Win-KeX",
"commandline": "wsl -d kali-linux kex --sl --wtstart -s",
},
WSL 中远程连接服务器
无需再另外使用 XShell 或者 terminal 等ssh管理工具了,直接使用下面命令进行对远程设备进行操作:
1 | ssh <user>@<IP>:<Port> # ssh连接 |
如果需要持久化管理,还可以打开 wsl 的 settings.json 在 profile 项中进行配置。
WSL 开启 systemctl
Supporting systemd required changes to the WSL architecture. As systemd requires PID 1, the WSL init process started within the Linux distribution becomes a child process of the systemd. Because the WSL init process is responsible for providing the infrastructure for communication between the Linux and Windows components, changing this hierarchy required rethinking some of the assumptions made with the WSL init process. Additional modifications had to be made to ensure a clean shutdown (as that shutdown is controlled by systemd now) and to have compatibility with WSLg, It is also important to note that with these change, systemd services will NOT keep your WSL instance alive. Your WSL instance will stay alive in the same way it did before, which you can read more about here.
上文是微软更新公告中对于宣布了 WSL 支持 systemd ,只需要按照如下操作即可开启 WSL 的 systemd ——编辑 /etc/wsl.conf 文件:
1 | [boot] |
保存之后,使用 wsl.exe --shutdown 关闭 WSL 系统,通过在 Linux 子系统中运行下面的命令可以验证 systemd 是否正常运行:
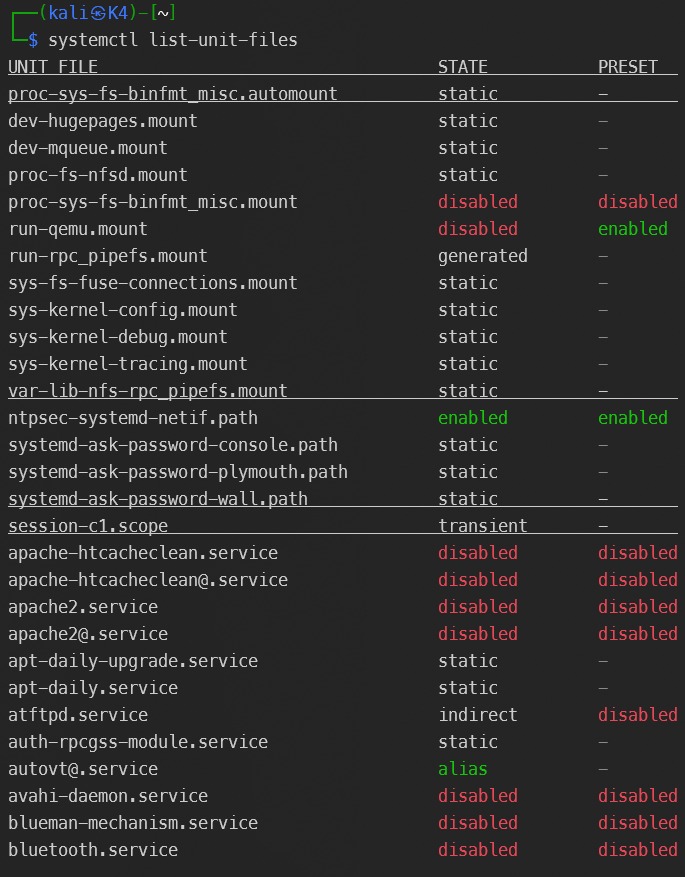
1 | systemctl list-unit-files |
正常的结果如下:
失败尝试
通过子系统IP进行代理
首先,找到 Linux 子系统的 IP 地址,可以查看 DNS 服务器动态分配给子系统的 IP :
1 | cat /etc/resolv.conf |
然后,将子系统的 IP 和代理客户端的端口(例如9000)组合成一个代理地址,例如 http://172.19.80.1:9000 ;
接着,将代理地址设置为ALL_PROXY环境变量,
1 | export ALL_PROXY="http://172.19.80.1:9000" |
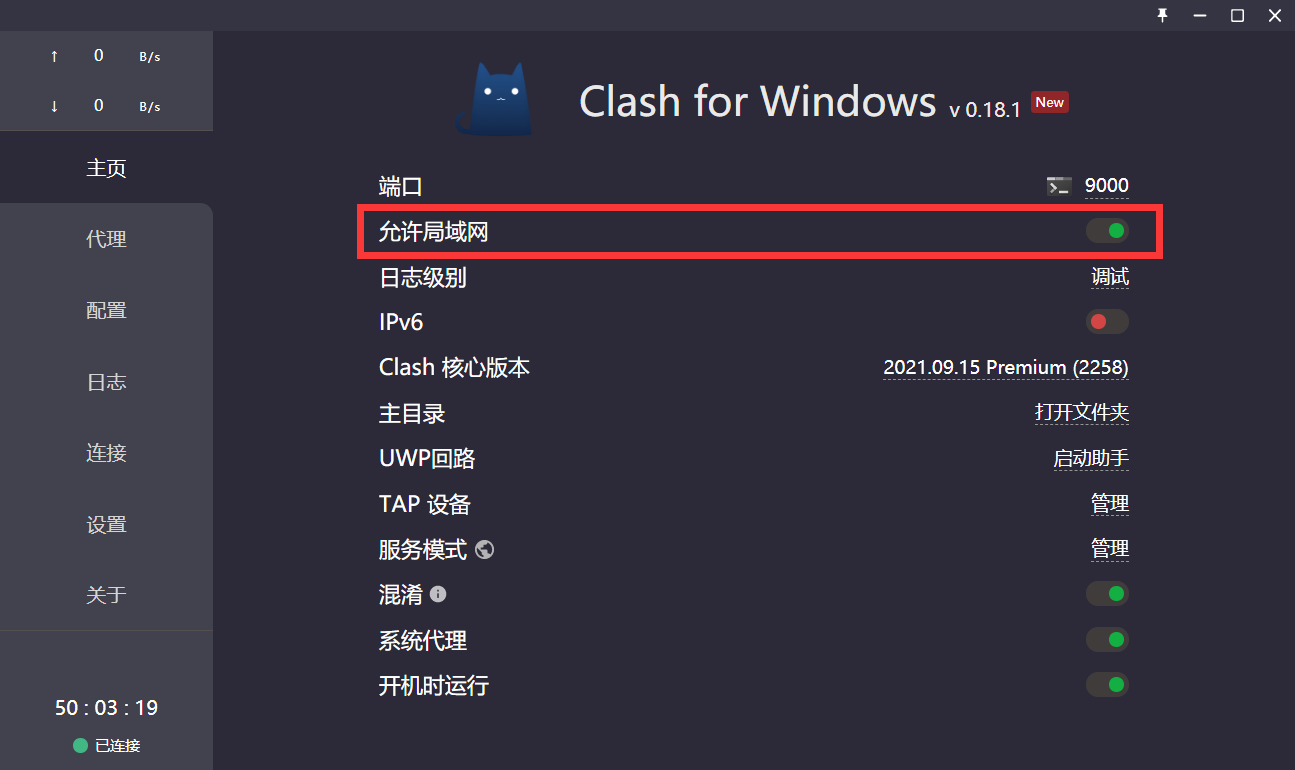
最后,确保 Windows 上的代理客户端允许来自本地局域网的请求。我使用的 Clash ,可以看到已经开启了允许局域网的选项。
如果需要开机自启动,可以使用下面的脚本 .proxyrc :
1 |
|
通过Windows IP 进行代理
莫名其妙用 DNS 服务器动态分配 IP 无法代理,但是直接用 Windows 的 IP 做代理却能成功转发,因此直接编写脚本 .proxyrc 如下
1 | export ALL_PROXY="socks5://<Windows IP>:<Port>" |
其中, <Windows IP> 是对应的 Windows IP ,如 192.168.0.xxx 等, <Port> 是代理端口。
然后将脚本的路径添加到 ~/.bashrc 或者 ~/.zshrc 文件中,这样每次登录 WSL 子系统时,就会自动执行脚本。例如:
1 | echo "source /path/to/.proxyrc -e" >> ~/.bashrc |
其中 /path/to/ 是一个占位符,表示要指定的文件或目录的路径,需要把 /path/to/ 替换成 .proxyrc 文件所在的路径,比如 /home/user/.proxyrc 。这样,每次每次登录 WSL 子系统时,就会自动执行 .proxyrc 文件中的命令,开启代理。